How to Measure a Doorway for a Dog Gate: A Step-by-Step Guide
Measure the actual mounting points, check every approved extension combination and plan the walk-through space. This question-led guide helps you avoid a gate that almost fits.
Jump to a section
How do you measure a doorway for a dog gate?
Measure the clear opening where the gate will actually attach, at both lower and upper mounting heights. Record each measurement without rounding, check the wall and baseboard shape, and compare those numbers with the exact model’s approved extension combinations. A broad advertised width range is a starting point; it does not always mean every width inside that range works.
This guide is a shopping and planning checklist for an ordinary, level indoor doorway. It is not a substitute for the installation manual supplied with your gate. Before buying, you should be able to explain where each mounting point will land, which parts create the correct width, and how people and pets will move around the finished setup.
Keep your notes together. The useful result is a small measurement record you can compare with a manufacturer’s diagram, rather than a single number remembered while browsing. If any detail remains unclear, ask the manufacturer about your specific opening before placing an order.
What should you gather before measuring?
Bring a tape measure, a notebook, a pencil and your phone for reference photographs. A second person can help hold the tape level across a wider opening. Move loose rugs, shoes and other clutter away so that you can see the floor and both sides of the doorway clearly.
Draw a simple outline of the opening. Mark the floor, baseboards, door trim and any nearby furniture. Photograph the entire doorway and then each proposed contact area. Include a close view of unusually thick trim, a sloping surface or an obstruction that is difficult to describe in words.
Do not start by guessing a gate height. First identify the model or shortlist whose mounting diagram you will use, then find its actual contact positions. A measurement taken at an arbitrary height may miss trim or a change in width exactly where the gate needs support.
Where exactly should you place the tape measure?
- Identify the intended gate line. Decide which part of the doorway will hold the gate, using the model’s instructions to assess whether that position is suitable.
- Measure across the lower contact points. Keep the tape straight and record the clear space between the surfaces the hardware would touch.
- Repeat at the upper contact points. Write a separate number, even if the walls appear parallel.
- Record changes in the opening. Note protruding trim, uneven surfaces and anything that would prevent the mounting hardware from sitting as intended.
- Measure again. Check your first readings before comparing them with a size chart.
Use the units shown in the manufacturer’s instructions. For US product listings this is often inches. Record fractions carefully instead of converting a close measurement into a convenient whole number. If you also record centimeters, label the units so that a later comparison does not mix the two.
Your narrowest reading matters, but do not automatically discard the wider reading. A gate must work with the whole opening and its mounting arrangement. Unequal top and bottom widths are information to investigate, not an invitation to improvise a correction.
How do baseboards and door trim affect the fit?
Baseboards can make the opening narrower near the floor than higher up. Decorative trim can also leave a small contact surface or push the gate away from the position you first imagined. Measure what is physically there, not the distance between the hidden wall surfaces behind the trim.
Write down the baseboard height and how far it projects into the opening. Then compare those features with the gate’s lower mounting points. If a contact point would land partly on trim and partly above it, photograph that exact area and ask whether the model can be installed there according to its instructions.
A wall adapter or spacer is not automatically a universal fix. Only consider accessories approved for your gate and the relevant mounting surface. Do not use stacks of household objects, improvised blocks or loose padding to make an incompatible opening appear to fit.
For renters, settle the mounting question before buying. The phrase pressure mounted alone does not establish that a particular installation will leave walls untouched or avoid screws. Read the complete instructions for the exact kit and discuss any required changes with the property owner where needed.
Can a gate fail to fit within its advertised width range?
Yes. Extension combinations can leave a gap between usable ranges. This is one of the most useful details to check before ordering. A headline that combines the smallest and largest supported widths may conceal how the gate reaches those endpoints.
For example, Carlson’s official page for its white Extra Wide Walk-Thru Pet Gate, model 0930PW, lists 29–32 inches without an extension and 34–36.5 inches with the listed 4-inch extension. It explicitly identifies 32–34 inches as a range the gate does not fit. If your reading is exactly on a shared boundary, obtain clarification rather than resolving the ambiguity yourself.
That example is specific to the stated model and package. It is not a sizing rule for other Carlson gates or other brands. A seller may offer different packages, so compare the selected model, included extensions and current instructions together.
Make a short list of approved combinations and place your measurements beside it. If none accepts your opening, remove that gate from the shortlist. A different gate with a suitable configuration is a better starting point than trying to stretch the meaning of a published range.
What should your measurement checklist include?
Use the following table as a record to complete before shopping. Keep the description specific enough that another person could compare it with the same instructions and understand what you measured.
| Item | What to record | Why it matters |
|---|---|---|
| Lower width | Clear distance at lower mounting positions | Accounts for baseboards and lower trim |
| Upper width | Clear distance at upper mounting positions | Shows whether the opening changes width |
| Contact surfaces | Material, shape and visible condition | Lets you check mounting compatibility |
| Extension combination | Approved parts for the exact model | Avoids gaps in the usable width range |
| Door swing | Nearby doors, furniture and walking route | Checks everyday access |
| Pet access | Gate height, bar spacing and small door | Prompts a separate suitability assessment |
Add the model number and the date you checked its instructions. If you later change the selected size or package, repeat the comparison. Similar product names are not enough to prove that the hardware and usable dimensions remain the same.
How much walk-through room will you have?
The doorway’s total width and the gate’s walk-through opening are different measurements. A frame can fit your hallway while its human access door still feels inconvenient for the way you use that hallway. Look for the actual opening dimension in the specifications.
Think through ordinary trips: carrying laundry, bringing in groceries or moving between rooms with another person nearby. Sketch the proposed walking path and note any adjacent door that swings into the same space. Do not assume a gate door opens both ways unless the exact model’s instructions confirm it.
Also inspect the planned floor area. Keep the route clear and consider whether a frame member or threshold would be difficult for someone in the household to step across. If accessibility is uncertain, look for a more suitable arrangement before installation.
A good fit on paper should also support a workable routine. Ask who will operate the latch, how often the doorway is used and whether the gate can be opened without moving furniture every time. These are practical selection questions rather than evidence of any model’s tested performance.
How can you compare two shortlisted gates?
Create one row for each exact model and package, then put your doorway measurements at the top of the page. Under each option, write the approved extension combination, the mounting requirements and the clear walk-through width. Leave a field blank if the information is unavailable; a blank is a question to resolve, not permission to borrow a specification from another model.
Next, identify the practical trade-off. One option may have a more convenient opening but require an installation your space cannot accommodate. Another may fit the width but interfere with an adjacent door. Compare these consequences before looking at optional finishes or accessories.
Save the relevant instructions with your order record. This makes it easier to explain a mismatch if the delivered kit differs from what you researched. It also gives anyone else in the household a clear reference when the gate needs checking or moving.
How do you check whether the gate suits your pets?
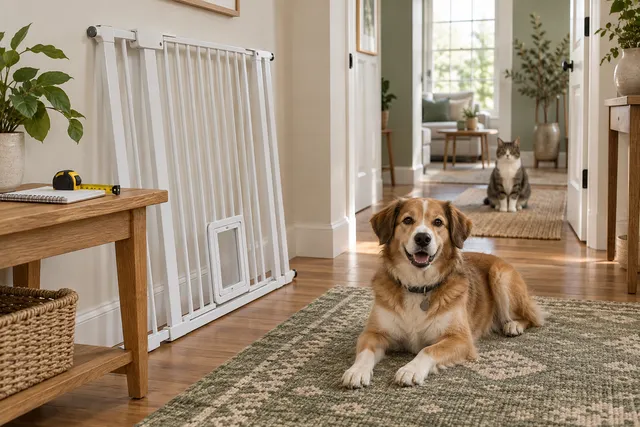
Room measurements alone cannot establish suitability. Check the manufacturer’s restrictions alongside the gate’s height, bar spacing and any small pet door. A small access door intended to let one animal through may also let a smaller dog through.
The linked Carlson manual warns against use if a pet can climb over or dislodge the gate, and identifies risks when an animal’s head can fit through openings. It also prohibits using that gate at the top of stairs or as a pool barrier. Treat those as limits for that product, not as a complete safety assessment for every gate.
For your own shortlist, read each model’s instructions and think about the animals sharing the home. If a gate cannot separate them in the intended way, a different doorway arrangement may be needed. Do not rely on a taller-looking photograph or a seller’s general description as proof that a determined pet will remain contained.
What should you do when the gate arrives?
Before assembling anything, compare the box label with the model you researched. Lay out the supplied parts in a pet-free work area and compare them with the parts list. Check that the expected extensions and mounting hardware are present.
Read the included manual from start to finish, then compare its diagrams and dimensions with your saved notes. If they differ from the listing you used, stop and resolve the mismatch with the seller or manufacturer. Do not substitute instructions from a similar-looking gate.
During installation, follow the specified sequence and checks. Afterward, use the manufacturer’s inspection routine and keep the documentation for future reference. Reassess the setup whenever you move the gate, change the surrounding furniture or notice damage or movement.
A successful delivery is not the end of the fit check. The final arrangement needs to match the approved installation and remain workable in the household. Return or exchange an incompatible gate instead of treating a close fit as a finished solution.
What other questions do owners ask?
Can I round a measurement down?
No. Record the actual reading, including the fraction, and compare it with the manufacturer’s accepted configuration. Near an endpoint, ask for confirmation rather than assuming a small difference can be absorbed.
Should I order extra extensions just in case?
Identify the approved combination first. Extra pieces do not necessarily create continuous coverage between two widths, and compatibility depends on the model. An extension should solve a documented fit requirement.
Can I use the same measurements in another doorway?
Measure the new opening independently. It may look identical while having different trim, wall surfaces or clearances. Keep a separate record for each proposed location.
Does this guide recommend one gate for every home?
No. The Carlson dimensions illustrate why detailed checks matter. Choose only after matching the specific product’s instructions to your opening, your pets and the people using the doorway.
Which sources support this guide?
Product details were checked on September 15, 2026. The measuring worksheet and shopping sequence are editorial planning advice; no hands-on gate testing is claimed.
- Carlson: Extra Wide Walk-Thru Pet Gate, white — model identity and published width combinations.
- Carlson instruction manual covering model 0930PW — referenced restrictions. Always follow the manual supplied with your exact current kit.
Next, explore doors, gates and ramps, or read our focused indoor crate review if you are comparing ways to organize a dog’s resting area. These products serve different purposes; compare the intended routine before comparing specifications.