How to Measure Dog Paws for Boots Without Mixing Size Charts
Measure each weight-bearing paw, keep the original readings and use the exact boot model’s chart rather than assuming all brands share a sizing rule.
Jump to a section
The direct answer: measure the paw, then read the model’s rule
For a boot whose chart uses paw width, measure across the widest part while the dog is standing with weight on that paw. Record every paw separately, then apply the instructions for the exact boot model. Do not select a size from breed, body weight or the size name on a different brand’s boot.
This guide explains a measurement and shopping workflow for ordinary dog boots. It does not determine whether a dog needs boots, prescribe a medical boot or establish protection against a particular surface or temperature. If the purpose involves an injury, dressing or another clinical need, obtain fitting advice from your veterinary team rather than adapting an ordinary chart yourself.
The most useful outcome is a short record of actual measurements, their units and the chart you used. Keep those facts separate from the size you eventually select. If a fit question comes up, you can then show how you reached the decision instead of trying to recreate it from memory.
1. Find the exact chart before measuring
Open the manufacturer’s page for the boot under consideration and locate its sizing instructions. Note whether it asks for width, length, another measurement or a combination. A measurement can be carefully taken and still be unhelpful if it describes a different dimension from the one the chart requires.
For example, the Ruffwear Summit Trex sizing section specifies width across the widest part of a weight-bearing paw. It tells readers to measure all paws because front and rear sizes can differ, and to size down when between its sizes. That is a model-specific instruction, not a universal rule for dog footwear.
Save the model name and chart link with your notes. If a retailer shows a different chart or the package describes a different version, resolve the mismatch before choosing. A chart copied into an old product photograph may not answer questions about the selection currently being sold.
2. Prepare a simple measuring space
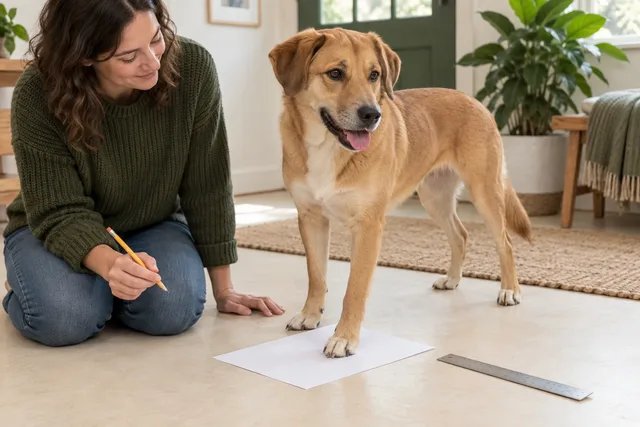
Gather plain paper, a pencil and a ruler with clearly readable units. Choose a stable place where your dog can stand comfortably without sliding. Keep the paper flat and the ruler ready so that you can measure the marks afterward rather than trying to read a scale while your dog is moving.
A second adult may help keep the session calm and organized, but the task should not require forcing a paw into position. If your dog steps away or will not settle, stop and try another time. A rushed outline produced during movement is not a reliable starting point for an exact size choice.
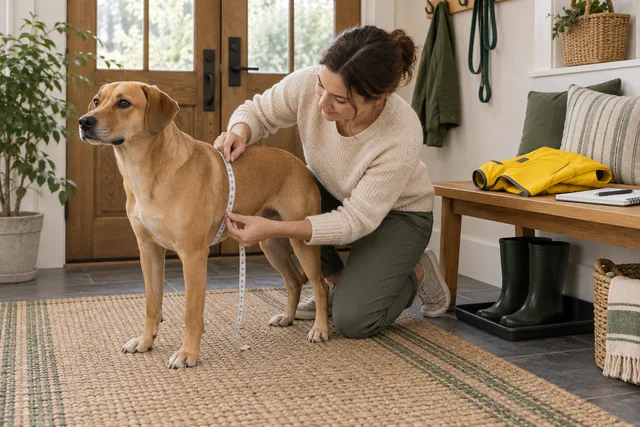
Keep the pencil beside the paw, not pressed against it, and avoid placing tools where the dog could step onto a sharp point. The cover photograph illustrates preparation only. It is not a scale drawing or a demonstration from which you can estimate your own dog’s dimensions.
3. Make a standing outline or width marks
The Hurtta Weekend Warrior instructions describe standing on paper, tracing the paw and measuring the widest part of the resulting outline. They also call for separate front and rear measurements. Standing matters because the paw spreads under weight; a lifted paw is a different measurement condition.
Follow the method shown for your selected model. With a paper outline, keep the pencil upright so that leaning it outward does not create a wider shape. For a chart that directs side marks instead, place them at the specified edges. Move the paper to the ruler after the dog has stepped away.
Do not pull the toes apart to make an outline look more complete, or squeeze them together to fit a preferred size. If the dog shifts while you are marking, label that attempt as uncertain and repeat it. The objective is to capture the instructed standing measurement, not produce a tidy drawing at any cost.
4. Read width as a straight distance
Locate the widest part relevant to the manufacturer’s method and measure the straight distance from one side to the other. Width is not the distance around the paw. Wrapping a tape around it and comparing that circumference with a width chart answers a different question.
Align the ruler’s zero mark with one side; do not assume the physical end of every ruler is zero. Read the other edge in the same unit. Write the number immediately. A notation such as “front left, width, millimeters” is more useful than an unlabelled number written beside several outlines.
If the chart also requires length, use its stated endpoints. Do not assume every brand includes nails in the same way or that the widest outline automatically supplies all required dimensions. When endpoints are unclear, ask the manufacturer to explain them rather than adding an arbitrary allowance.
5. Keep all four paws identifiable
Label separate attempts as front left, front right, rear left and rear right from the dog’s perspective. Write the date on the page. Even when two readings look similar, preserve them individually until you have checked the selected chart and decided how the boots are sold.
Do not average all four readings into a single value simply to make one size field easier to fill. That would discard the distinction you measured. A front-versus-rear difference may affect the order, while an unexpected difference between repeated measurements of the same paw may indicate that the measuring process needs another look.
A useful notebook entry contains the paw label, required dimension, first reading, repeat reading and any uncertainty. Keep observations separate from interpretation. “Paper moved during the second attempt” is actionable information; silently replacing the first number with the second hides why they differed.
6. Repeat doubtful readings before choosing
Repeat a measurement if the outline is smudged, the paw moved or you cannot identify the intended edge. Use the same method and units. Repeating with a different technique may create another number without explaining which one matches the chart.
For a hypothetical example, suppose one attempt reads 58 millimeters and a moving attempt reads 62. Those figures do not prove that 60 is the correct compromise. Take a fresh, clearly labelled attempt and retain the original notes. If you still cannot obtain a consistent measurement, ask for fitting help rather than presenting an average as certainty.
The numbers in this example are invented solely to explain recordkeeping; they do not map to a recommended size. A dog that seems uncomfortable with handling should not be kept in a prolonged measuring session just to finish a worksheet. Return to the task when an appropriate calm approach is possible.
7. Keep units visible through the comparison
Use the same unit as the chart when possible. If your ruler shows millimeters and the chart uses centimeters, divide the millimeter reading by ten. For example, 58 millimeters is 5.8 centimeters. Preserve the original reading beside the converted value so you can check the arithmetic.
One inch equals 25.4 millimeters. If conversion is necessary, carry enough precision to compare with the chart without rounding early into a different interval. A rounded shopping note should not replace the raw measurement when the result is near a boundary.
Read the column heading carefully. Some size labels resemble measurements, while other brands use letters or numbers that are simply names. A medium in one model does not establish a medium in another. Compare the actual required dimension and the manufacturer’s interpretation of it.
8. Follow the correct between-sizes instruction
Different products can give different boundary instructions. The Hurtta page uses a closest-width approach and supplies its own additional guidance, while the cited Ruffwear page says to size down between sizes. Do not combine one brand’s chart with another brand’s rounding rule.
Copy the relevant instruction into your private measurement record with its source. If your exact reading is on a boundary, or if the wording does not clearly address it, ask the manufacturer which size it means. Guessing that extra room is always desirable is no more reliable than assuming a tighter boot must stay on better.
Avoid adding a finger-width allowance, sock allowance or growth allowance unless the chosen product’s instructions call for it. If you plan to use an accessory, identify it when asking about fit. An improvised adjustment to the paw measurement can hide the actual number that a support person needs.
9. Check the package before placing an order
After identifying the candidate sizes, check whether the listing sells individual boots, pairs or a set. Read what the selected quantity includes. A photograph of four boots does not by itself establish what will arrive in one package.
If front and rear paws point to different sizes under the maker’s instructions, confirm how that combination can be ordered. Keep the actual selection visible in your notes: model, front size, rear size, package contents and quantity. This is an ordering check, not a reason to change a measurement to match the available stock.
Review the seller’s current fitting and return conditions before using new boots outdoors. Do not assume an indoor fit check and outdoor wear are treated identically. Keep packaging and order details available until you understand whether the delivered model and sizes match what you selected.
10. Treat arrival as a fit check, not proof
Read the supplied fitting instructions before putting on the boots. The chart gives a starting selection; it does not prove that every part of a particular boot will suit every paw and leg. Use the maker’s fastening and introduction guidance rather than inventing a universal strap-tightness rule.
Check that you are using the intended front and rear selections and that the delivered labels match the order. If something seems wrong, pause and compare the item, chart and raw measurements. Do not try to compensate automatically by tightening a closure harder.
Ask the maker for help when the chart and delivered fit do not agree. Describe the model, size, measurements and what you observe. A factual report gives more useful information than saying only that the boots are bad or the dog is difficult. This guide does not set a universal wear duration or guarantee that a boot cannot rotate or come off.
A reusable measurement record
Use these fields in a notebook or private document: “Dog; date; exact boot model; manufacturer chart address; required measurement; unit; front left; front right; rear left; rear right; repeat readings; uncertainty; boundary instruction; proposed order.” Keep a blank template separate from the completed record.
Add a final line for “confirmed with manufacturer” only when that conversation has actually happened. Record the answer and date rather than using a checkmark to imply that every question has been resolved. If you change models, revisit the chart fields before reusing the size selection.
The record can also prevent a later household mix-up. Someone helping with an order should be able to distinguish measurements from selected sizes and see which paws each pair is intended for. A photograph of your labelled paper may help preserve that context, provided the written figures remain readable.
Frequently asked questions
Can I choose by breed or body weight? Use the dimensions required by the exact model. A breed example on a listing does not replace measuring your dog’s paws.
Can I reuse a raincoat measurement? No. Back length and body girth answer different fitting questions. Our raincoat measuring guide covers those separate measurements.
Must front and rear sizes match? Do not assume so. Retain the separate measurements and follow the product’s chart and ordering options.
What if I cannot get a clear reading? Pause, check the method and seek fitting help if needed. An uncertain reading should remain labelled uncertain rather than becoming a confident size recommendation.
Should I pack new boots for a trip immediately? Complete the appropriate fitting and introduction first. Our overnight packing guide addresses organizing equipment once you know what is suitable to bring.