How to Clean a Slicker Brush After Grooming
Remove trapped fur, check the pins and follow model-specific cleaning and drying directions without assuming every slicker brush can be soaked.
Jump to a section
The short answer
Remove collected hair, inspect the pins and pad, follow the brush maker’s cleaning directions, and let the whole tool dry before storage. Do not assume that every slicker brush can be soaked. A metal pin surface can sit above a cushion, mechanism or handle that needs a different care method.
This guide covers ordinary home care after grooming. It helps you choose a sensible sequence for the brush you already own, including fixed-pin and hair-release designs. It does not provide a disease-control protocol or claim that a visibly clean brush is disinfected.
Keep the distinction between removing fur and washing the tool clear. The first task may take very little effort after each session; the second depends on residue, construction and the manufacturer’s instructions. A button that releases fur does not answer the washing question.
Identify the tool before adding water
Look for the brand and model on the handle, packaging or order record. Find the matching care instructions and save them with a photograph of your brush. A retailer’s description of stainless pins is not a complete description of the materials inside the head.
Check whether yours has a flexible pad, a wooden handle, a release button or removable parts. Record any instruction about immersion, cleaning agents and drying. If the directions only explain how to remove hair, ask the manufacturer about wet cleaning before choosing a method.
For a useful construction-specific example, Chris Christensen’s tool-care FAQ tells owners not to soak or submerge its brush pads. That warning is a reason to consult the correct maker, rather than applying a generic bowl-of-water tutorial to every slicker.
Set up a small, controlled work area
Put the brush on a stable surface with enough light to see between the pins. Set out a waste container, a clean cloth and any small cleaning tool permitted by the instructions. Keep an unused dry cloth separate from the one that collects dirt.
A simple tray can keep loose fur and small accessories together while you work. Do not balance everything on the narrow edge of a sink. Move your dog away from the tools so that you can inspect the brush without simultaneously holding a leash or preventing a curious nose from approaching the pins.
Keep the process small. There is no need to assemble a collection of cleaners before you know what the brush requires. Start with inspection and hair removal; introduce only the materials specified for the next step.
Remove loose hair without levering the pins
Hold the handle securely and lift accessible fur away gently. Work in small sections if the hair has formed a dense sheet. Avoid digging under that sheet with a knife, scissors or another sharp improvised lever.
If your brush maker recommends a cleaning comb or brush-cleaning tool, use it in the manner shown. Do not force a wide tooth through a narrow gap or drag it sideways until the pins bend. Stop when the tool catches instead of treating resistance as a reason to pull harder.
Collect the fur in the waste container as you go. This makes it easier to see what remains at the pin bases. Removing the obvious layer first also gives you a clearer view of whether you are dealing with ordinary loose hair, sticky product residue or damaged parts.
Use a hair-release button as directed
Some slickers move a plate or retract pins to lift the accumulated hair. Follow the particular button sequence for your model, keeping fingers clear of the moving parts. Remove the released fur before returning the mechanism to its working position.
Andis describes its self-cleaning slicker feature as a way to release collected hair. That is a helpful convenience, but it should not be read as a promise that oils, dirt or cleaning-product residue disappear too.
If the button jams or the plate moves unevenly, stop. Check the instructions for an approved remedy. Do not pry the mechanism apart, force the button with a hard object or continue grooming with pins that fail to return evenly. Photograph the problem if you need manufacturer support.
Inspect the empty brush head
View the cleared pins from above and from the side. Look for an isolated bent pin, broken tip, rust-colored area, lifting pad or crack in the head. Compare suspicious areas with the original design; many slicker pins have an intentional bend.
Check the handle attachment as well. A brush that shifts at the joint needs attention even when its working surface looks clean. Do not test a suspect sharp edge on your dog’s skin or assume that bending a damaged pin back restores it.
Separate uncertain tools from the ready-to-use collection. A small note attached to the handle can prevent another person from picking it up before the issue is resolved. Cleaning and deciding whether the brush remains usable are separate decisions, and both deserve a moment.
Choose the cleaning method your model allows
For residue that remains after hair removal, consult the care directions you saved. Follow their method for the pins, pad and handle rather than applying one treatment to the entire brush. If a named cleaner is required, check that you have the correct product.
Chris Christensen’s FAQ gives a specific routine using its foam cleaner with a small brush, wiping, and a directed drying step. This is an example of manufacturer guidance, not a universal recipe for other brands. Its care page should be read in full by owners of those tools.
If instructions are missing, send the manufacturer a short question naming the model and the residue you want to remove. Asking whether a particular method is permitted is more useful than asking whether the brush is simply washable.
Control residue and moisture during the job
Work where you can see the area you are cleaning. If the directions call for a damp cloth, use a damp cloth rather than turning that instruction into immersion. If they specify rinsing, follow that instruction instead of assuming a quick wipe removes everything.
Check the joint around the pad and the handle grip as well as the pins. These areas can be easy to overlook when attention stays on the fur-catching surface. Use only the access and cleaning method the maker permits; do not open a sealed head to reach an unseen area.
When you finish, inspect for remaining visible residue under good light. If you cannot remove it using the approved method, set the tool aside and seek advice. Adding more products in succession can leave you uncertain about what is still on the brush.
Keep cleaning and disinfection separate
The CDC distinguishes cleaning from disinfecting: cleaning removes dirt and germs, while disinfection uses chemicals to kill germs. Follow both the tool’s material-care directions and the disinfectant label when disinfection is needed. Do not mix cleaning chemicals.
If the brush was used on a dog with a suspected contagious skin condition, ask your veterinarian how to handle that tool before sharing or reusing it. A routine fur-removal session does not establish that it is suitable for another animal.
This guide deliberately does not supply a universal dilution or soaking time. Compatibility and the purpose of treatment need to be resolved together. A household care tip should not be substituted for the instructions appropriate to an identified health concern.
Finish drying before closing the storage box
Use the drying method allowed for your brush. Do not assume that a hair dryer, radiator or sunny car is acceptable for every handle and cushion. Where the manufacturer gives a drying instruction, follow its details rather than adding heat to speed things up.
Choose a place where the tool can finish drying without being knocked down or reached by your dog. Keep the working surface free from weight that could deform pins. Avoid burying it beneath towels or other grooming tools while moisture is still present.
Before putting it away, check the pad edge, handle joint and any accessible recess. A dry-looking pin tip does not tell you whether the rest of the head is ready for storage. If you are uncertain, leave the tool out of its closed container longer.
Build a routine around actual use
Make removing hair and checking condition part of putting the grooming kit away. That is a practical opportunity to notice a problem, rather than discovering a full brush when your dog is already waiting for the next session.
Plan further cleaning around the care instructions and what you find: visible dirt, product buildup or a specific contamination concern call for different decisions. Avoid inventing a fixed weekly washing schedule that ignores whether the brush was used once or many times.
For a shared household, assign a clear place for tools awaiting cleaning and a separate place for those ready to use. A simple label is often enough. Write down an unresolved fault or missing care instruction so the next person does not need to repeat the same investigation.
Include the cleaning accessories in this routine. Put a used cloth with the items awaiting laundering and care for the small cleaning brush according to its own instructions. Label that accessory for pet-tool care so it is not mistaken for a household toothbrush. Clear the tray before returning the dry grooming tool, rather than placing it back among the hair you just removed.
Troubleshoot before replacing or repairing
If hair stays trapped near the pad, check whether you have missed the maker’s recommended removal tool or release position. If a button fails after visible hair is removed, treat that as a mechanism question rather than a reason to keep pressing harder.
If a mark remains after permitted cleaning, photograph it in good light and ask whether it indicates corrosion or material damage. Appearance alone may not identify its cause. Keep the brush out of use if the pins or pad could scratch or snag.
Compare replacement cost with an approved repair, if one exists, but do not let price determine whether an obviously damaged tool touches your dog. Save the model details when you replace it so that the next brush’s instructions are easier to find.
Frequently asked questions
Can every slicker brush go in soapy water?
No universal immersion method is established here. Read the instructions for the exact brush, including its pad and handle. A metal working surface does not make the complete assembly waterproof.
Does self-cleaning mean that washing is unnecessary?
The term may describe a hair-release mechanism. Use it for the task described by the maker, then inspect for other residue. Check the care instructions separately.
Should I pull out a pin that looks bent?
Do not alter the brush as an improvised repair. Compare the shape with the original design and contact the manufacturer about a damaged pin. Set the tool aside if its condition is uncertain.
Can I put a damp brush back in its travel pouch?
Wait until the permitted drying process is complete. Plan your cleanup early enough that packing does not force you to seal the tool away while it is still damp.
Keep the next session simple
Your finished kit should contain a cleared, inspected brush with no unresolved cleaning or condition issue. Keep its care link somewhere easy to retrieve, alongside the model name. That small record matters more than remembering a generic cleaning trick.
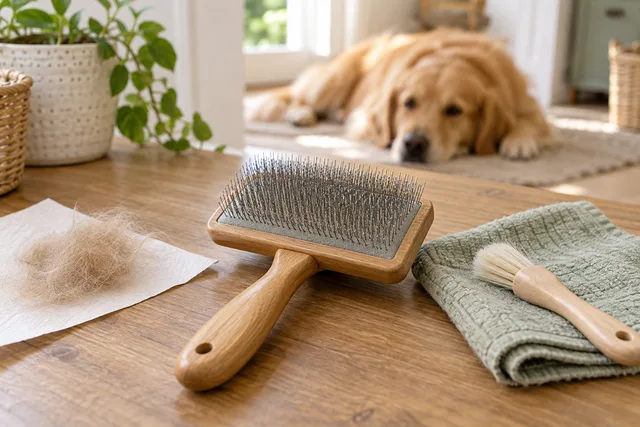
Sources checked September 19, 2026: the linked Chris Christensen care FAQ, Andis product explanation and CDC pet-supplies guidance. The cover is an illustrative home-care scene, not a demonstration of a particular brand’s instructions.
For related planning, see our Hertzko slicker buying assessment, removable bed-cover washing guide and grooming library. Brush care and choosing the right grooming tool are separate tasks; keep both aligned with your dog’s needs.