How to Check a Wire Dog Crate for Damage Before Reusing It
A practical inspection routine for an empty wire crate: identify the model, examine panels and tray, check the closure and record concerns before reuse.
Jump to a section
Direct answer: inspect the empty crate before the dog enters
To check a wire dog crate, take the dog out, remove loose contents, identify the exact model, and examine the frame, joins, door, closure and tray in good light. Compare the assembled structure with its own instructions. If you find a broken wire, sharp damaged area, missing retaining part or closure that will not engage as intended, keep the crate out of use while you obtain model-specific guidance or a suitable replacement.
This is a household observation routine, not a structural certification or a repair tutorial. A crate can look tidy and still have an assembly problem; a small inspection cannot prove that it will contain every dog. The aim is to notice issues before reuse and collect useful information for a decision. No particular crate is being recommended for purchase.
1. Make space for an inspection without the dog
Arrange another appropriate place for your dog before starting. Do not inspect a questionable closure with the dog shut inside to see whether it holds. Move bowls, bedding, toys and other loose items out of the crate so you can see the base and corners. Put removed items where they will not become a tripping hazard.
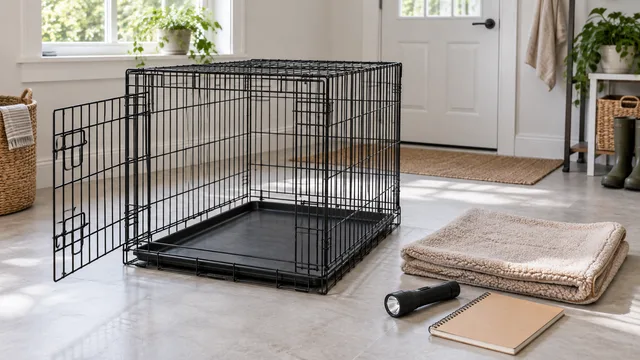
Use a level area with enough light to see both sides of the wire panels. A flashlight is useful for shaded corners, but it is not a reason to reach blindly along an edge. Look first. If you can already see a broken wire or jagged tray, avoid handling that area unnecessarily and keep children and pets away.
Photograph the assembled crate before changing anything. A broad view preserves the position of the door, divider and panels. If a problem later turns out to be incorrect assembly, that photograph can help explain what you saw. Do not dismantle an unfamiliar crate simply because another model folds a particular way.
2. Identify the model and the correct instructions
Find the manufacturer, model or item number, and any useful label still attached to the crate. Check the original order or receipt if the label is incomplete. A size description such as thirty inches does not uniquely identify a product. Single-door and double-door versions, different generations and different ranges can use different retaining arrangements.
Use the manufacturer’s support or instructions page to locate the matching document. For example, MidWest provides a library of separate folding-crate instructions. Match the numbers inside the document, not just the file name or the first picture in a search result.
Treat a missing manual as an information gap. If the crate is secondhand and you cannot establish its identity, do not borrow an assembly sequence from a similar-looking product and call the result verified. Record what you know and ask the manufacturer whether the model can be identified. A low purchase cost does not resolve uncertainty about missing hardware.
3. Walk around the frame and compare its shape
Start with an overall view from the front, back and both sides. Does one panel lean or sit differently from its opposite side? Is a corner visibly pushed in? Did the crate start rocking after storage or transport? These observations are prompts to investigate, not measurements of how much damage is acceptable.
Compare panel positions and intended connection points with the model’s instructions. Purposeful bends, hooks and overlaps are part of many folding designs. Their existence alone is not damage. The question is whether each part is present and arranged as specified, or whether a section has changed shape, separated or lost its connection.
Avoid pressing hard on panels, climbing on the roof or loading the frame to imitate a strength test. Such experiments do not establish a safe working limit and can create another problem. If a section seems bent, photograph it from more than one angle instead of trying to bend it back before you have documented it.
4. Look closely at wires, joins and accessible edges
Examine the perimeter and the places where wires meet. Look for an obviously separated join, a loose wire end, an unexpected gap or a section projecting into the living space. Pay attention to the doorway and lower corners because those areas may be difficult to see when bedding is in place.
Do not run bare fingers along a suspect edge as your method of finding a sharp point. Use light and a close photograph. If an area is obscured, change your viewing angle while keeping clear of it. A photograph that shows the concern in relation to the surrounding panel is more useful than an extremely close image with no context.
Note damaged coating or corrosion without assuming you can judge the underlying strength. An inspection guide cannot give a universal acceptable rust depth for all wire crates. Flaking, roughness or a questionable join needs attention before reuse. Covering a spot with tape may conceal what you need to examine and is not a structural repair.
5. Check the door and closure while the crate is empty
Open and close the door using the procedure for the exact model. Watch how it meets the frame and whether all intended latching points engage. A door that needs an unexpected lift, twist or force deserves investigation. First compare assembly with the manual; do not immediately assume either harmless wear or a defective latch.
MidWest’s referenced iCrate instructions, for their listed models, describe fully engaging the slide bolt and putting its handle down. That example illustrates why the final position matters. It is not a universal instruction for every crate latch. Your crate may use a different mechanism or more than one fastening point.
If the closure cannot be operated as instructed, stop using that crate until the issue is resolved. Do not add a padlock, carabiner or improvised tie to compensate for an unexplained misalignment. A modification can hide the original problem and complicate opening the door. Ask about the intended part and arrangement instead.
6. Inspect the tray and its retaining arrangement
With the crate empty, inspect the tray in place and remove it only as its instructions allow. Look for cracks, broken corners, raised fragments or a distorted area. Check beneath bedding rather than judging the surface from the visible strip at the entrance. A mat can hide a defect without fixing it.
Examine the tray edge and the part intended to retain it, where the design includes one. The referenced MidWest instructions describe a pan stop; other crates may differ. Confirm that your tray sits where it belongs and that the specified retainer is present. Do not assume a tray of approximately the right size is a compatible replacement.
If replacement is needed, record the model and the existing tray’s identifying details before ordering. Interior dimensions, edge shape and retention can matter as well as advertised crate length. Ask for confirmation when the replacement description is ambiguous. Keep a cracked tray out of service rather than trimming an edge and treating it as restored.
7. Review the divider and anything added to the crate
If a divider is installed, compare its attachment and orientation with the matching instructions. Check it from the dog’s side as well as the unused side. A divider is part of the setup, so an otherwise sound outer frame does not make an uncertain divider arrangement acceptable.
Look at accessories separately. A bowl bracket, cover, bed or added storage pocket can obstruct something you need to inspect. Remove items that hide a closure or make the assembly unclear while you assess it. Do not assume an accessory is approved for the crate just because it can be attached to a wire.
This inspection also differs from checking size. A crate may be intact yet no longer provide appropriate room for the dog. Use our dog-to-crate measurement guide for that separate question. The absence of visible damage is not a complete assessment of comfort, training or suitability.
8. Clean only enough to reveal the condition clearly
Dirt can make a seam or a tray edge difficult to assess. Follow the crate’s own cleaning directions before making a final visual check. MidWest’s cited instructions specify mild, non-abrasive cleaners and water for the finish and pan. They also warn against prolonged direct sunlight on that plastic pan. Those are model-document instructions, not a recipe for every material.
Do not use aggressive scraping or a chemical mixture to make a damaged area look new for the inspection. If you do not know which cleaner is suitable, resolve that first. Cosmetic improvement does not tell you whether a join, latch or panel is sound.
Keep cleaning and damage decisions separate in your notes. Write whether you removed ordinary debris, found a persistent rough area, or could not see a connection clearly. That distinction helps avoid calling a stain structural damage or dismissing a broken area as something that merely needs washing.
9. Turn your observations into a clear support request
Make a short record with the brand, model, approximate purchase date and where the concern is located. Add one overall photograph, one medium-distance view and a close view of the issue. Include what happens during normal operation, such as a bolt stopping before its intended final position. Describe observations rather than guessing the cause.
MidWest’s support page specifically asks for the product brand and item number to help identify an inquiry. The same habit makes a question clearer when contacting another manufacturer through its official support route. Keep receipts and correspondence together so you do not have to reconstruct the details later.
Ask whether the part is replaceable for that exact model, what the approved replacement is, and whether any further inspection is needed before reuse. Do not assume a warranty will cover every kind of damage or that a photograph guarantees a diagnosis. Keep the crate unavailable to the dog while an unresolved concern remains.
10. Decide what happens next and record it
There are three useful outcomes: no concern found in this limited check; an assembly question that needs the correct instructions; or damage or a missing part requiring action. Do not collapse those outcomes into a single pass mark. Record the uncertainty as clearly as the things you were able to observe.
If a manufacturer-approved part is fitted, repeat the relevant checks using the supplied directions before the dog returns. If the crate cannot be restored through an appropriate documented route, choose another suitable arrangement. Avoid handing a damaged crate to another owner without clearly explaining its condition.
Repeat the inspection after an event that could change the structure, such as a fall, rough transport or a forceful escape attempt, and when bringing a stored crate back into use. This guide sets no universal replacement age or inspection interval. Your model’s instructions and actual condition take priority over a calendar assumption.
Frequently asked questions
Can I straighten a bent wire myself? This guide does not provide a bending or welding repair procedure. Document the change and ask the manufacturer about the exact model instead of assuming its original strength can be restored.
Does a working latch mean the crate is sound? No. It is one part of the inspection. Panels, joins, tray and installed accessories can have separate issues.
Should I put the dog inside to test the closure? No. Check normal operation with the crate empty. A dog is not a test load for questionable equipment.
Can bedding cover a cracked tray? Bedding hides the area; it does not repair it. Identify an appropriate replacement and resolve the defect before reuse.
Does this prove suitability for car travel? No. A home inspection does not establish crash performance or travel approval. Follow the requirements for the particular transport use separately.
Sources and a final location check
The model-specific examples above come from MidWest’s listed iCrate assembly and maintenance instructions; check the model numbers in the document before applying them. The inspection order and observation record are practical editorial organization, not a manufacturer certification checklist.
When the equipment question is resolved, use choosing a dog crate location to assess the surrounding space. Keep the identity, condition and location questions distinct so a good answer to one does not conceal a problem with another.