How to Prepare a Dog for a Professional Photo Session
Plan portrait priorities, photographer communication, secure handling, a compact session bag and gallery follow-up before your dog’s appointment.
Jump to a section
Start with a clear session plan
Prepare for a professional dog photo session by agreeing on the photographs you want, sharing practical information about your dog, confirming the location and handling arrangements, and packing familiar essentials. Put the appointment details and your three most important picture requests in one short note. The aim is to arrive with fewer unanswered questions, not to turn your dog into a trained model overnight.
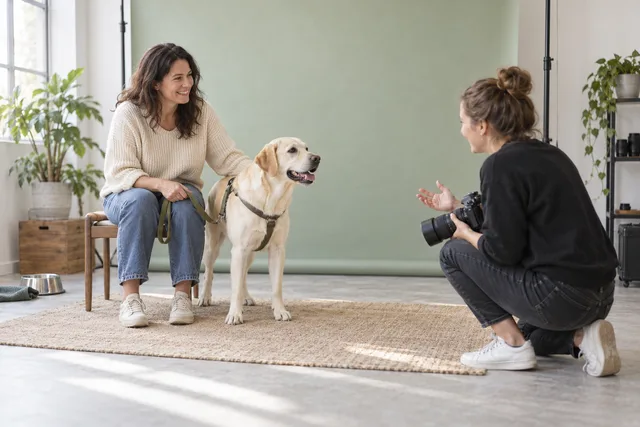
This guide covers commissioned portraits and the owner’s preparation for an appointment. It does not replace a photographer’s own instructions, teach camera technique or explain how to make identification photographs for a lost-dog file. Those are different tasks. The cover is an illustrative scene, not an actual appointment.
Step 1: decide what you want to receive
Begin with the finished use: a framed portrait, a small album, pictures with family members, or a digital collection. Write that down before choosing individual poses. A session intended for a vertical frame may call for different compositions from a wide photograph above a sofa. Ask the photographer which formats the booking can reasonably accommodate.
Choose three priorities and label everything else optional. For example: a dog-only portrait, one picture with the owner, and a relaxed image showing the dog’s usual expression. An extensive list can consume the appointment in transitions. A short list makes it easier to adapt when one setup does not suit the dog or the available space.
If you bring reference pictures, explain what you like about each: the light, the background, the closeness or the relationship shown. Do not assume the photographer will reproduce another artist’s exact image. Ask what is realistic in the booked location and session length, and keep that answer with your appointment note.
Step 2: confirm the booking details in writing
Check the date, meeting time, exact entrance and contact method for delays. Distinguish the time you should arrive from the time photography starts. A park name alone can leave you at the wrong gate; a studio address may not explain which door admits animals. Save the photographer’s actual directions instead of relying on a map search at the last moment.
Ask what the session fee includes: time, number of participants, image selection, editing and any physical products. Clarify whether digital files or prints are included or purchased separately. You are gathering the terms of this booking, not assuming that all photographers use the same package structure. Keep the written answer where you can find it after the session.
Also ask about weather changes, rescheduling, late arrivals and a session that must end early. Find out who makes the weather decision and how you will be contacted. If the forecast changes, a clear communication plan is more useful than guessing whether light rain automatically cancels an outdoor appointment.
Step 3: send a concise dog brief
Give the photographer information that affects the setup: how your dog responds to strangers, nearby dogs, unfamiliar sounds and new rooms; whether stairs or long walks are difficult; and who normally handles the dog. Describe observations plainly. A note such as needs space from unfamiliar dogs gives more planning information than saying the dog is occasionally difficult.
Professional Photographers of America’s preparation guide emphasizes telling the photographer about anxieties or special needs. Use that principle to agree on practical accommodations before arrival. You do not need to send a full private medical history to explain that a ground-level setup or a shorter walking route is needed.
Include the number of dogs and people attending. If you want children or several pets in the same picture, ask how the photographer plans to organize those combinations. Do not add an extra animal as an unannounced surprise. The available space and handling plan may have been arranged for the original booking.
Step 4: agree on secure handling
Ask which leash, collar or harness arrangement the photographer expects, then explain any equipment your dog needs to remain securely controlled. Professional photography can be planned around an attached leash. Coastal Photo Studio’s preparation guidance specifically advises against removing a leash merely to obtain a particular picture when doing so would be unsafe.
Ask about editing rather than assuming it. CM Bryson describes leash removal as part of that studio’s process, while other photographers may handle it differently or limit it to certain images. Confirm what is included for your booking. A photographer’s example of a leash-free final photograph is not an instruction to release your dog at the location.
Decide who holds the leash during each setup and during transitions. If you will appear in photographs, ask whether a familiar adult helper would be useful. Keep required identification and necessary equipment in place; aesthetic preferences should be discussed within the handling arrangement that works for your dog.
Step 5: make the location workable
For a studio, ask about the route from parking to the entrance, waiting arrangements and whether other animals may be present. For an outdoor appointment, ask about the meeting point, walking distance, surface and available places for breaks. You are looking for logistical fit, not simply the prettiest background in a portfolio.
If the proposed route contains steps or a long walk that will not work for your household, raise that before the date. Request an alternative setup rather than hoping the problem disappears when everyone arrives. A specific question about access is easier to answer than a general request for a stress-free experience.
For public spaces, confirm with the photographer who checks the venue’s rules and any photography permissions. Do not assume a booked session creates permission to enter restricted areas or ignore posted animal requirements. If a location becomes crowded or unavailable, know whether the plan is to wait, move or reschedule.
Step 6: pack a small, organized session bag
Coastal Photo Studio recommends familiar rewards, water, waste bags, a toy and a towel for outdoor sessions. Build a compact kit around your own dog’s usual needs. Keep anything the dog can access separate from camera equipment and the photographer’s work area. Pack the bag before departure so that you are not searching for routine items while trying to leave.
If food rewards are suitable for your dog, bring familiar permitted options and tell the photographer about restrictions before anyone offers something different. Do not change meals, medication or a prescribed routine simply to improve a photograph. This article does not recommend dietary or medical adjustments for a session.
Step 7: keep appearance preparation familiar
Professional Photographers of America’s guide notes that a bath is not always necessary and that brushing may be enough. Decide what appearance you actually want to remember, then plan ordinary grooming accordingly. If a recent haircut looks different from your preferred style, discuss timing rather than trying to correct it hurriedly on the morning of the appointment.
Select accessories your dog already tolerates. A familiar bandana or blanket can be more meaningful than a newly purchased costume. Ask whether the item fits the intended setup and whether it will take time to arrange. If it interferes with normal movement or secure handling, leave it out of the picture plan.
Prepare your own clothing if you will be photographed. Consider whether you can sit, kneel and walk in it and whether you are comfortable with fur on the fabric. Bring a practical layer or spare item if useful. Your comfort affects how easily you can participate in the agreed poses, even when the dog is the main subject.
Step 8: make an arrival and break plan
Leave enough travel margin to follow the agreed arrival instructions, park and organize belongings. Contact the photographer if you are delayed rather than silently compressing the session. If you arrive early, use the designated waiting arrangement; do not assume an occupied studio or another client’s appointment is ready to receive you.
Coastal Photo Studio advises keeping routines familiar, allowing settling time and avoiding exhausting a pet before the session. Treat preparation as an ordinary outing adjusted to your dog’s needs. A last-minute attempt to tire the dog out is not a reliable substitute for discussing the session structure in advance.
At the start, agree on how to request a pause and where you can step aside. A clear phrase such as we need a break avoids confusion while the photographer is concentrating on the camera. Keep water and the exit route accessible. The planned picture list should remain adjustable throughout the appointment.
Step 9: use the brief without directing every frame
Tell the photographer which three images matter most, then let them organize the technical sequence. They may choose an order based on light, equipment or which setup is currently available. Your role is to provide information about your dog and follow the agreed handling plan, not to supply simultaneous camera direction from several people.
Ask who should call the dog’s name or hold a toy during each attempt. Several people making competing noises can create conflicting directions. If an attention-getting method does not suit your dog, say so. A familiar reward or a quieter setup may be more workable than increasing the intensity of the effort.
If a pose is not comfortable or practical, ask for an alternative. A standing portrait, an owner interaction or a simpler background may still meet the original aim. You are commissioning pictures of this dog, so a useful outcome does not depend on reproducing a pose that was successful for another animal.
Step 10: close the appointment and track delivery
Before leaving, account for the dog, equipment and any personal props, then confirm the next contact point. Ask when and how previews or a gallery will be shared, how you make selections, and whether there is a deadline. Record the photographer’s answer rather than assuming that a payment receipt also contains the delivery instructions.
When the gallery arrives, compare your choices against the original purpose. A favorite close-up may suit a small print while a wider composition better fits a planned wall display. Ask the photographer about available crops and output options before placing an order that depends on a specific shape. Keep the selection identifiers clear so there is no confusion between similar frames.
Clarify the permitted uses of delivered files and whether public portfolio sharing is optional under your booking arrangements. Ask questions about terms you do not understand before agreeing to them. Store your final files and order confirmation in a place you can retrieve; a temporary gallery link is not the same as your own saved copy.
A one-page note you can prepare
Use these headings in your appointment note: booking and contact details; exact meeting instructions; attending people and dogs; three priority photographs; handling equipment; relevant access or behavior observations; packed essentials; weather decision; and gallery follow-up. Leave a small space for the photographer’s answers instead of writing a long narrative.
Review the note once before departure and update anything that changed. If the dog is not able to attend comfortably that day, contact the photographer about the applicable options. An organized brief should make it easier to adapt the appointment, not pressure you to complete every planned image regardless of circumstances.
Frequently asked questions
Does my dog need to know tricks? No particular trick is assumed by this preparation plan. Describe what your dog can comfortably do and ask the photographer which setups fit those abilities.
Should I remove the leash for portraits? Do not remove secure equipment simply for appearance. Agree on handling first and ask whether editing is available for the photographs you want.
Do I need new accessories? Not necessarily. Familiar items may be enough. Confirm any desired props with the photographer before buying or bringing a large collection.
What if my dog needs frequent breaks? Tell the photographer before the booking so that timing and location can be discussed. Ask how an early finish or reschedule is handled rather than assuming a universal policy.
Are digital files always included? Packages differ. Check the written details for image numbers, editing, delivery and any separate print or file purchases.
Sources and related reading
Sources checked October 12, 2026: Coastal Photo Studio’s pet session preparation, Professional Photographers of America’s preparation guide, and CM Bryson’s session checklist. Photographer-specific practices are examples, not promises about another provider. The booking worksheet and sequencing are editorial planning suggestions.
Related reading: Prepare identification photographs, Prepare for a grooming appointment and Check local trail rules.