How to Check a Dog Harness Fit Before a Walk: Questions Answered
Check the correct model instructions, strap placement, hardware and movement before opening the door. A practical fitting routine with clear stop points.
Jump to a section
How do you check a dog harness fit before a walk?
Start with the instructions for the exact harness, inspect the straps and fastenings, put it on in the correct orientation, and check the fit while your dog stands and moves indoors. Resolve slipping, rubbing or damaged hardware before opening the door. A size label and a single finger check are not the whole assessment.
This guide is a practical routine for an ordinary walking harness. It does not certify equipment for car travel, lifting, running or other specialist uses. It also cannot establish an individual dog’s fit from a photograph. Use it to organize what you observe and identify questions for the manufacturer.
The most useful result is a repeatable decision: ready for this walk, needs a specific adjustment, or needs further help. You do not have to keep tightening straps until the first answer becomes possible. Sometimes the shape or size needs reconsidering.
What should you have ready before fitting?
Choose an enclosed, familiar space and allow time before you need to leave. Have the harness, its current instructions, a flexible measuring tape and the leash you intend to use nearby. If another household member helps, agree who handles the dog and who reads the directions so you are not making competing adjustments.
Find the model name on the label or order record. Two harnesses from the same company can have different strap layouts. A product photograph can help identify which way a panel faces, but it should not replace a fitting diagram. Check whether your instructions refer to the same version as the item in your hands.
Keep small parts and packaging out of the working area. If your dog is uncomfortable with the process, pause rather than rushing through it to meet a departure time. Completing a fitting task is less important than being able to observe it calmly.
Does the size chart settle the fit question?
A chart helps choose a starting size. It does not show how the finished harness sits on your particular dog. Record the measurements requested by the maker, in the units used by its chart. Do not swap a chest measurement for a weight estimate simply because the latter is easier to remember.
For one concrete example, PetSafe’s Sure-Fit instructions use girth measured behind the front legs around the rib cage to select a size. They also describe specific shoulder, girth and under-chest adjustments. That is guidance for Sure-Fit, not a universal diagram for every PetSafe harness.
When a measurement falls near a boundary, consult that model’s sizing advice rather than automatically choosing the larger option. Note which straps are already near the end of their adjustment range. This gives customer support a much clearer question than saying only that a medium looks wrong.
How do you inspect the harness before putting it on?
Lay it out where you can see both sides. Trace each strap from one connection to the next, looking for twists or an end that has worked out of its keeper. Compare any unfamiliar threading with the maker’s diagram before changing it. Photograph the existing arrangement if you are unsure how it was assembled.
Look closely at the fastening points, including areas usually hidden under padding. The Edmonton Humane Society harness guide recommends checking for frayed fabric and cracked plastic buckles. It also emphasizes observing posture and movement, avoiding rubbing at the elbows or armpits, and using manufacturer instructions for detailed fitting.
If something appears damaged, set the harness aside and ask about an approved repair or replacement. Do not make a cracked buckle seem usable with a temporary wrap. Keep a separate note of the damage so it does not get confused with a sizing problem.
Which straps should you adjust first?
Follow the sequence for your model. Do not assume the direction that tightens one slider will work the same way on every harness. Make one adjustment, look at its effect, and then continue. Changing every strap at once makes it harder to identify which change improved or worsened the fit.
Ruffwear’s Front Range adjustment sheet, for example, recommends extending the straps first and then tightening them to fit. It shows separate shoulder and girth adjustments and how the webbing passes through the adjusters. Use that diagram for that harness instead of trying to infer the threading from an unrelated design.
After an adjustment, check that the webbing lies as intended and the fastenings close fully. If you cannot reach an adjuster without awkward handling, take a break and reconsider the setup. A quiet second attempt is more useful than forcing a quick result at the doorway.
What does the two-finger check actually tell you?
It is a practical spacing check, not a certificate that the harness cannot slip or cause discomfort. Follow the manufacturer’s wording and specified locations. In its Sure-Fit guidance, PetSafe describes a close two-finger fit between the skin and nylon strap. The Humane Society also includes a two-finger check as part of its broader fitting advice.
Do not rely on a comfortable gap at the easiest point to reach while ignoring the rest of the harness. Nor should you tighten until you must force your fingers underneath. If the instruction is hard to interpret on your dog’s coat or body shape, ask the maker to clarify its intended check.
Keep spacing, placement and movement as three separate observations. Writing down all three prevents a familiar shortcut: deciding that because one measurement passed, nothing else needs attention. A harness can look centered in a still photograph and shift once the dog turns.
What should you look at while your dog moves?
With the fitting area still enclosed, watch a few ordinary steps and turns rather than asking for vigorous exercise. Look from more than one side. Is a panel changing position? Does a strap approach the elbow differently during a step? Can you still identify the same fit landmarks shown in the instructions?
Describe what happens before deciding why. For example, write “the chest panel moves left when she turns” rather than “she needs a smaller size.” The first statement is an observation you can compare after an adjustment; the second jumps to a solution that may not address the cause.
Stop if the equipment seems to impede normal movement or your dog shows discomfort. Do not conduct an escape test by deliberately pulling the dog backward out of the harness. If slipping is already a concern, get model-specific fitting help before relying on it outdoors.
What should you do when the fit is not right?
Use a short troubleshooting note instead of a series of improvised fixes. Record where the issue occurs, whether it happens while standing or moving, and which adjustment you tried. If you return to the original setting, say so. This keeps an unsuccessful change from becoming the new default by accident.
- Panel sits off-center: check orientation and compare strap settings with the fitting diagram.
- A strap hangs loose: identify its purpose and permitted adjustment before shortening it.
- Hardware does not close normally: stop and inspect the fastening rather than treating it as a size issue.
- The dog can slip partly out: stop using that arrangement and seek fitting help.
- Discomfort continues: remove the harness and resolve the cause before another walk with it.
These are decision prompts, not a diagnosis or a substitute for a product manual. Avoid cutting webbing or adding holes to create an adjustment the maker did not provide.
How can you make tomorrow’s check easier?
Once you have a suitable arrangement, save the model name, size and fitting instructions together. Take a clear side and front photograph for your own reference, while remembering that pictures do not replace an in-person check. If more than one person walks the dog, show them the actual fastening routine.
A useful note has four fields: equipment identity, instructions link, recent change and unresolved question. A recent change might be washing the harness, using a coat underneath or someone adjusting a strap. The note helps you decide what needs rechecking without recreating the whole purchase history.
Do not assume the last fit remains correct indefinitely. Check again when something relevant changes, and make a brief inspection part of leaving the house. The goal is a habit small enough to repeat, with a clear pause whenever something is different.
For a shared household, keep the instructions where the leash is stored. A new walker should not need to search through messages to identify the correct attachment point. If the harness has several rings, label a reference photograph in your private notes instead of adding loose accessories to the equipment. Review that note whenever you change models so old instructions are not carried forward.
Which questions should you send to the manufacturer?
Send the exact model and size, the requested body measurements and a plain description of the issue. Mention whether an adjuster is at its limit. If support accepts photographs, provide the views it requests rather than a distant picture with the important strap hidden.
Ask one answerable question at a time: “Where should this panel sit on this model?” is more useful than “Is this fine?” If you are between sizes, ask how its sizing guidance applies to the measurements you supplied. Keep the reply with the fitting instructions for other household members.
If the maker recommends another model, compare the reason before buying. More adjustment points may address a different problem from a different panel shape. This guide is not a reason to replace functioning equipment; it is a way to avoid guessing when the current fit remains unresolved.
Frequently asked harness fitting questions
Can I use the same size in another brand?
Do not treat size names as interchangeable. Compare the new model’s chart with the measurements it requests, then assess the actual fit. Keep the old harness’s size as a reference, not as proof of the new one.
Does a front attachment remove the need for training?
No. The Humane Society distinguishes equipment choice from teaching loose-leash walking. A fitting check addresses how the harness sits; it does not teach the walking behavior you want.
Can a walking harness double as a car restraint?
Do not infer a vehicle-use claim from the presence of a handle or metal ring. Check the product’s stated use and its specific vehicle instructions. This walking-fit routine does not assess crash protection or certify a travel setup.
Should I leave the harness on after the walk?
The Humane Society warns about equipment catching or tangling and recommends removing harnesses when dogs are unsupervised. Follow your model’s use instructions and make removal part of returning home.
Can a photo prove the fit is safe?
No. A picture may help a support conversation, but it cannot show every contact point or everything that happens during movement. Use photographs to document observations, not to replace checking the dog and equipment together.
The check before you open the door
Confirm the model instructions, intended orientation, strap arrangement, sound fastenings and ordinary movement. Attach the leash at the designated point and keep the departure calm. If a question remains unresolved, pause the walk with that equipment rather than relying on a hurried adjustment.
Explore Collars, Harnesses & Leashes for related articles. Our PetSafe Easy Walk review discusses a specific across-chest design; do not use its layout as instructions for a different harness. For another fit task, see how to size a soft carrier.
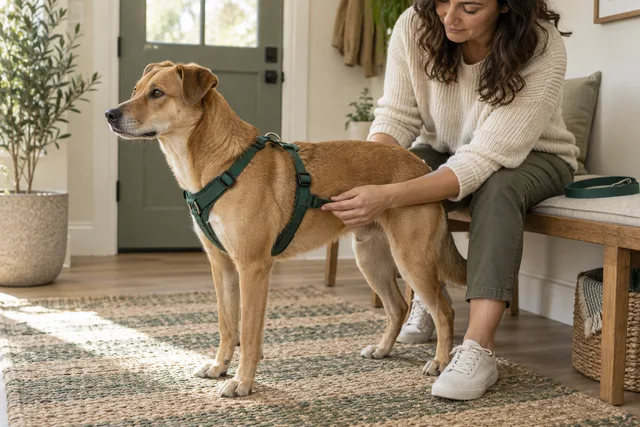
Sources were checked September 17, 2026. Named examples remain specific to their manufacturers. The record-keeping and troubleshooting workflow is editorial guidance, not a hands-on product test. The cover is an illustrative, unbranded scene and should not be used as a fitting diagram.