How to Measure Your Car for a Dog Ramp
Measure entry height, ground space, clear width and storage before comparing dog ramps, with worked examples that separate slope length from footprint.
Jump to a section
Measure the setup, not just the car
Measure the vertical height of the intended ramp support point, the usable space on the ground, the clear opening and the space available for storing the ramp. Then compare those measurements with the exact ramp’s installation instructions. A vehicle model name or a maximum weight rating cannot answer all four questions.
This guide helps you prepare a useful measurement record before buying. It does not certify a ramp installation or prescribe a safe incline for every dog. The worked examples explain geometry; they are not recommendations for a particular animal or product.
Keep your dog away from the measuring area while you work. Use a parked vehicle on a stable, level surface, secure it against movement and open the intended access point. There is no need to involve the dog in an improvised ramp test to collect these measurements.
Choose the actual entry point
Decide whether the dog will enter through the rear cargo opening or a side door. These locations may have different heights, landing surfaces and obstructions. Make separate records if you want to compare both instead of combining one location’s height with another location’s available space.
PetSafe’s ramp-selection guidance starts with the height at the intended entry location. Its examples distinguish rear access from backseat access. Use that principle to identify the real support point specified by your candidate ramp’s instructions.
Do not automatically measure the highest edge you can see. A bumper, cargo floor, seat and door sill are different surfaces. The place where a ramp is allowed to rest must be established before its height becomes a useful number.
Make a simple measurement sheet
Give each entry location a separate heading. Leave spaces for support height, clear opening width, ground space, photographs and the candidate ramp model. Write the date and note whether the vehicle is empty or loaded as it normally would be for the trip.
Use one unit system throughout. Inches are convenient for many US product listings; centimeters are equally workable if you convert consistently. Label every number rather than relying on memory. The conversion is 2.54 centimeters per inch, so a 24-inch height is 60.96 centimeters.
Keep observed measurements separate from advertised specifications. You might label one column vehicle and another ramp. This prevents a common planning error: copying a seller’s maximum length into the space where you meant to record the actual room behind your car.
Measure vertical height
Measure straight down from the proposed upper support point to the ground beneath it. This is the vertical rise. Keep the tape vertical rather than running it diagonally toward where you imagine the foot of the ramp might land.
If the edge makes that difficult, ask another adult to help hold the tape or use a straight reference to locate the point above the ground. Do not climb into an unstable position to get a reading. Record the result and repeat the measurement to catch an obvious mistake.
Check the situation in which the ramp will normally be used. Uneven parking, a curb or a slope changes the relationship between the car and ground. A measurement taken on a level driveway should not be treated as a verified setup for every roadside stop.
Measure available ground space
From the point directly below the upper support, measure horizontally outward along the intended route. Identify where the bottom of a ramp could stand on an appropriate surface, and what space remains beyond it for the dog to approach.
Keep the ramp footprint and the approach area as two separate notes. A ramp might physically fit while leaving its bottom against a wall, parked vehicle or hedge. You also need room for the person helping the dog without standing in traffic or an awkward gap.
Use your actual parking locations as examples. If home provides a long driveway but the destination has tight spaces, write down both. A good fit at home does not resolve the destination. It may be more practical to change the parking plan than to shorten a ramp beyond a suitable configuration.
Understand length, rise and horizontal run
In a simplified side view, the ramp forms the sloping side of a right triangle. The vertical rise is the height; the horizontal run is the ground distance. Ramp length and horizontal run are not the same measurement.
For that idealized triangle, horizontal run equals the square root of ramp length squared minus rise squared. All values must use the same units. If a straight ramp’s usable sloping span were 72 inches and the rise were 24 inches, the run would be approximately 67.9 inches.
The angle in this example is approximately 19.5 degrees, calculated as the inverse sine of 24 divided by 72. These numbers illustrate why the footprint differs from the advertised length. Real contact points, lips and product geometry can change the usable span, so the calculation does not replace the installation guide.
Compare a second length without inventing a safety cutoff
Using the same hypothetical 24-inch rise, a usable sloping span of 60 inches produces a horizontal run of about 55 inches and an angle of about 23.6 degrees. Compared with the 72-inch example, it occupies less ground distance but has a steeper slope.
That tradeoff is useful for comparing space requirements. It does not establish that either angle is appropriate for your dog. Do not turn a neat numerical result into a universal cutoff or a medical recommendation.
Check the manufacturer’s stated entry-height guidance for the exact model. If your dog has a mobility problem or you are choosing equipment after an injury, ask your veterinarian about the animal’s needs. Geometry can describe an arrangement; it cannot determine whether your dog can comfortably use it.
Check the clear opening and support surfaces
Measure the narrowest usable part of the entry route, including protruding trim or other obstacles. Write down where that width was measured. An opening may be wider at one level than another, so a single measurement across the widest point can be misleading.
Compare the clear route with the ramp’s outside dimensions and installation requirements. Also distinguish the overall width from the walking surface between any side rails. These are separate product details, and neither should be guessed from a perspective photograph.
Photograph the proposed upper support and lower landing area. If compatibility is unclear, those photographs and labeled measurements give the manufacturer a concrete question to answer. Do not assume that a curved plastic trim piece is a permitted load-bearing support just because a ramp can be balanced against it.
Treat side-door use as its own installation
A side door can introduce an angled approach, a limited opening and different attachment requirements. Measure it separately and read any side-entry instructions. Rear-access approval does not automatically extend to a side door on the same vehicle.
For example, PetSafe’s telescoping-ramp setup page directs side-door users to its adaptor instructions. This is product-specific guidance, not evidence that every ramp needs the same accessory or that one adaptor fits every brand.
Before buying an adaptor, confirm the exact ramp, accessory and vehicle arrangement. Avoid solving an uncertain fit with straps or blocks that are absent from the instructions. If the supported installation is unclear, keep that option unresolved on your comparison sheet.
Measure storage and the handling route
Find a place for the ramp when it is not deployed. Measure the available storage length, width and depth, allowing for surrounding items and the actual way you will move it into place. A folded dimension that matches one shelf does not prove you can maneuver the item through the opening.
For a telescoping design, distinguish the stored length from the operating range. For a folding design, check the folded dimensions rather than dividing the full length by a guessed number of sections. Use the manufacturer’s figures for the exact model.
Think through where the ramp goes once the dog is inside. It should not compromise the dog’s travel arrangement or prevent doors from closing correctly. Record a storage plan before departure so you are not balancing unfamiliar equipment around the dog at a busy stop.
Use a comparison record that exposes unknowns
For each candidate, record the full model name, permitted entry arrangement, usable length information, width, stated load limit, stored dimensions and relevant instructions. Add your measured rise and ground space beside them. Mark unanswered questions explicitly instead of filling them with assumptions.
Keep a weight rating separate from your fit decision. A rating alone does not describe incline, traction, contact geometry or your ability to handle the ramp. It also does not authorize people to walk on a pet-only product.
Save the source of each specification. If two retailers disagree, consult the manufacturer before ordering. Similar names can refer to standard, compact or extended models. A comparison is only useful when each row consistently describes one identifiable product.
Verify the delivered item before involving the dog
Check the model and supplied instructions against your measurement record when the ramp arrives. Inspect for visible damage or missing components, and resolve discrepancies before use. Follow the product’s installation process rather than treating this planning guide as assembly instructions.
For its telescoping model, PetSafe specifies stable support at all four rubber feet and recommends acclimation before first use. Those details show why a paper calculation is only the beginning of verification. Read the full directions applicable to the equipment you actually have.
Do not improvise a load test by standing on a ramp designed only for pets. If the setup does not match the permitted arrangement, stop and seek clarification. A return or a different parking location is preferable to forcing equipment into a space it does not suit.
Frequently asked questions
Can I choose a ramp from my car’s make and model?
That information can help a manufacturer answer questions, but measure your actual entry point and available space. Vehicle names do not describe every trim level, support surface or parking situation.
Is the ramp’s length the distance it uses on the ground?
No. The ground footprint is the horizontal run; the ramp lies along the slope. The worked examples show the difference, subject to real product contact geometry.
Should I choose the shortest ramp that fits?
Do not choose from storage convenience alone. Compare the resulting arrangement with the manufacturer’s guidance and the individual dog’s needs. A shorter span at the same rise is steeper.
Can I use a curb to change the height?
Do not assume an improvised curb arrangement is approved. Check the required support and landing conditions. Reconsider the location if you cannot achieve the permitted setup.
Do these calculations certify a safe angle?
No. They describe idealized geometry only. They do not test traction, stability, strength or a dog’s ability to use the ramp.
Keep the record for future trips
Your finished notes should identify an entry point, its vertical rise, ground and approach space, clear opening, storage location and the exact ramp instructions. Keep unresolved questions visible until they have been answered. Recheck when the vehicle, equipment or location changes.
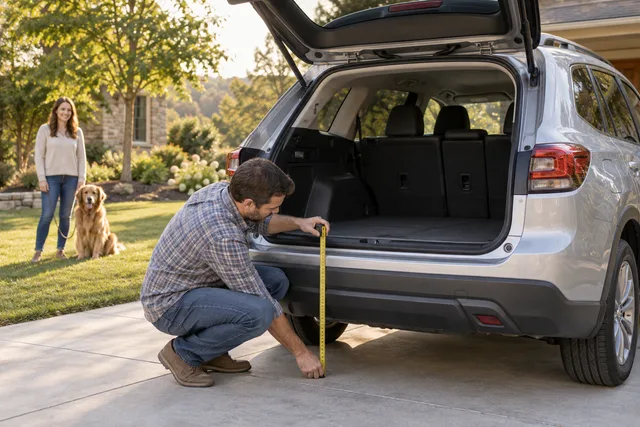
Sources checked September 19, 2026: the linked PetSafe selection and setup guidance. Worked dimensions are hypothetical calculations, not tested product measurements. The cover is an illustrative measuring scene with no installed ramp.
For related planning, see preparing a carrier for a day trip, measuring for a crate and the doors, gates and ramps library. Each addresses a different decision; no single measurement settles every part of travel preparation.